2024年5月27日星期一

Essential House Painting Tools for Beginners

Painting your house can be an exciting yet daunting task, especially if you’re a beginner. The key to a successful and stress-free painting project is having the right tools at your disposal. Whether you're planning to refresh a single room or give your entire home a new look, here’s a comprehensive guide to the essential house painting tools you'll need to get started.

1. Paintbrushes

Types of Paintbrushes:

Flat Brushes: Ideal for large, flat surfaces like walls and ceilings.

Angled Brushes: Perfect for cutting in around edges and corners.

Detail Brushes: Used for intricate areas and touch-ups.

Choosing the Right Paintbrush:

When selecting a paintbrush, consider the type of paint you’re using. Natural bristle brushes work best with oil-based paints, while synthetic bristle brushes are suitable for water-based (latex) paints. A high-quality brush can make a significant difference in the finish and ease of application.

2. Paint Rollers

Roller Covers:

Short Nap (1/4" - 3/8"): Best for smooth surfaces like plaster and drywall.

Medium Nap (1/2"): Versatile and works well on semi-smooth surfaces.

Long Nap (3/4" - 1"): Ideal for rough or textured surfaces like brick and stucco.

Roller Frames:

A sturdy roller frame with a comfortable grip is essential. Consider a frame with an extension pole attachment for painting ceilings and high walls without a ladder.


3. Paint Trays and Liners

A paint tray is necessary for holding and evenly distributing paint on your roller. Use disposable tray liners to make cleanup easier and to avoid mixing different colors or types of paint.

4. Painter’s Tape

Painter’s tape is crucial for achieving clean, sharp lines and protecting areas you don’t want to paint. Look for a high-quality tape that adheres well and removes cleanly without leaving residue or peeling off existing paint.

5. Drop Cloths

Protect your floors, furniture, and other surfaces from paint drips and spills with drop cloths. Canvas drop cloths are durable and reusable, while plastic and paper drop cloths are affordable and disposable options.

6. Sandpaper and Sanding Blocks

Preparing surfaces before painting is vital for a smooth finish. Use sandpaper or sanding blocks to smooth out rough areas, remove peeling paint, and create a surface that paint can adhere to better. Fine-grit sandpaper (120-220 grit) is typically suitable for most painting prep work.

7. Putty Knife and Spackle

A putty knife and spackle are essential for filling in holes, cracks, and imperfections in walls and surfaces. After applying spackle, sand the area smooth for a seamless finish.

8. Paint Edgers

Paint edgers are handy tools for applying paint along edges and trim without using painter’s tape. They help achieve straight lines and are especially useful for beginners who may find cutting in with a brush challenging.

Tips for Using Your Painting Tools Effectively

Preparation is Key: Spend time prepping your surfaces properly by cleaning, sanding, and repairing any damage. Proper preparation ensures better adhesion and a longer-lasting finish.

Use Quality Tools: Investing in high-quality brushes, rollers, and other tools can significantly affect the final result. Cheap tools can lead to uneven coverage, shedding bristles, and frustration.

Apply Primer: For the best results, apply a primer before painting. Primer helps paint adhere better and provides a uniform surface, especially on new or repaired surfaces.

Work in Sections: Paint one wall or section at a time, starting with the edges and corners using a brush, then filling in the larger areas with a roller.

Maintain Wet Edges: To avoid lap marks, maintain a wet edge by blending each section of paint into the previous one before it dries.

Starting a house painting project can be a rewarding DIY endeavor, but having the right tools is crucial for success. From paintbrushes and rollers to safety gear and cleaning supplies, each tool plays a vital role in achieving a professional-looking finish. By equipping yourself with these essential painting tools and following best practices, you'll be well on your way to transforming your home with confidence and ease. 

2024年3月17日星期日

How Does a Water Hose Nozzle Work

In this post, we'll share important details about what hose nozzles are, how they work, and how to use them. So, let’s dig right in!

What is Garden Hose Nozzle

A water pipe nozzle is an engineered device for steady flow. We use it to increase the velocity of the water. A water nozzle has a built-in mechanism that controls the direction of the water, its breakdown into droplets, and the dispersion pattern of the water flowing through it. A water nozzle is a simple device used to change the flow of fluid into a specific spray pattern.  

The hose nozzle connects to the end of the hose via a quick connect hose fitting or thread. It allows you to adapt the watering pattern to the specific work of the hose. You can adjust the hose nozzle for low water pressure or high water pressure. When you use a hose nozzle to water your plants, the water pressure should be gentle. And if you use a hose nozzle to wash your car, you need a higher water flow pressure. Therefore, you need to adjust the pressure of the nozzle according to the type of activity you are using the hose for. 

Most nozzles have a flow control option available. Use this to adjust the water flow level when selecting a different watering mode. 


How Does a Water Hose Nozzle Work?

Of course, there is science behind the mechanism that helps hose nozzles work. This is how hose nozzles distribute water in a series of patterns or spray patterns. If we try to explain it in simple terms, it might sound like this. 

Even though the hose nozzle itself is usually diffuse, the built-in nozzle is convergent. Built-in nozzles are precision drilled holes visible in the hose nozzle. They make different watering patterns possible. 

These small holes (nozzles) have a larger diameter inlet from which the water enters the nozzle. At the same time, they have a smaller outlet diameter, where the water leaves the nozzle.

Therefore, water enters the nozzle at high pressure and low velocity. It leaves the nozzle at low pressure and high velocity. 

How To Use a Hose Nozzle

Using a hose nozzle is a very simple process. You only need to start with two things. First, you need the best hose nozzle for your needs. Second, you will need the appropriate hose attachment or hose fitting. You will use these fittings to connect the nozzle head to your garden hose without missing a drop of water. Sounds simple enough, right?

It is always a good idea to have some good quality fittings for quick connections. Also, in the event you are not sure which size nozzle is right for your garden hose. Or in case you can't tell which type of fitting is compatible with garden hose and hose nozzles. 

Using one or more types of hose nozzles with a standard garden hose will definitely improve watering activities in your garden. However, it is best to learn more about these plumbing accessories before actually purchasing the nozzle. 

The information we share in this article will help you understand what hose nozzles are, how they work and how to use them.

Hopefully, this will give you a better understanding of what to look for when choosing a nozzle sprayer. 

2024年3月10日星期日

Tool Box Types: Chests, Cabinets, and Other Organizers Explained

Tool boxes represent a great underappreciated necessity for your workshop or garage. As your mechanical skills grow, so does your need to purchase quality tools. As your abilities grow, you realize that a wider variety of tools can help you do your job more efficiently. As a result, your tool collection expands, and that's great. But stacking your tools on your workbench, or in various portable carriers, or on scattered shelves just doesn't cut it anymore.

The scope of this article will focus on what are known as professional-grade or machinist-grade toolboxes: tool chests, roller cabinets, or a combination of the two. While you can certainly consider portable toolboxes, rolling tool carts, storage cabinets and small organizers, these are outside the scope of today's discussion. We'll zoom in on the all-metal, multi-drawer types of boxes you see in dealer service departments and well-organized workshops.


Tool Box Types

Let's define tool box types as the industry does first:

1."Toolbox", also called "Top Box": a multi-drawer toolbox that can be used as a stand-alone toolbox or placed on top of a roller cabinet. Please note that due to their size, "tool boxes" are designed to be at least waist-high. If used alone, they should be placed on a worktop or table. They usually do not come with wheels.

2."Roller cabinet", also called a "base box": a multi-drawer tool cabinet designed to be used as a stand-alone tool box or as a base for a tool box. Roller cabinets often include casters and are therefore designed to sit on the floor.

3."Combination boxes", also called "combo boxes" or "combination units": are a combination of a tool box (top box) and a roller cabinet (bottom box). Sometimes these cases are sold as a unit so that the user has cases from the same manufacturer and is assured that they will work well together.

4."Side Cabinet". A sideboard is a toolbox that is not designed to be used on its own, it is hung or mounted on the side of a roller cabinet to increase its capacity.

5."Pit Box". Similar to roller boxes, pit boxes have larger wheels and an oversized handle that can be used to pull the unit. Some loaded pit boxes are so heavy that they must be pulled with a small tractor. Racing teams use pit boxes, and they need more capacity to move the boxes from one place to another, occasionally on less than level terrain.

When you're ready to buy, the initial factors to consider are 1) the amount of storage needed based on tool ownership now and in the future, and 2) the space available at your desired location. Let's start by addressing storage needs. Make a careful assessment of your current tool inventory. Do you have what you currently need, or do you envision increasing your purchases in the near future? Have you been putting off buying tools, waiting for a good toolbox to be in place in the first place? At the very least, the box you want to buy will hold what you have now and will give you some clues for future expansion. Also, if you need more space in the future, consider buying add-ons.

Where are you going to put these boxes? The garage? The basement? Assuming you are looking for a rolling cabinet or a combination unit, measure the width of the space. Here are two more points: try to fill the width you have because you will gain a lot of storage space; remember, the top box can be the same width or less, but no wider. Maximizing the width will also keep the overall height at a reasonable number. While you may have space up to the ceiling, you don't want to have to use a ladder every time you need a particular wrench! So, you have to have plenty of room.

The best advice we can offer is this: buy the highest quality tool storage you can afford, sized to make the most efficient use of your space.

2024年2月25日星期日

Selecting the Right Grinding Wheel for Right Application

Grinding wheels are indispensable tools in various industries, serving the purpose of shaping, sharpening, and finishing workpieces with precision and efficiency. However, with a plethora of grinding wheel options available, selecting the right one for your specific application can be daunting. Factors such as material type, workpiece geometry, and desired surface finish must be carefully considered to ensure optimal results and safety. In this comprehensive guide, we delve into the key considerations and criteria for selecting the perfect grinding wheel for your unique needs.

Understanding Grinding Wheel Anatomy

Before delving into the selection process, it's essential to understand the anatomy of a grinding wheel. A typical grinding wheel consists of abrasive grains bonded together by a matrix material, with additional components such as porosity, structure, and bond type influencing its performance. The abrasive grains determine the cutting action and material removal rate, while the bond material provides support and stability. Furthermore, the wheel's porosity and structure affect chip clearance, coolant flow, and surface finish.


Key Factors in Grinding Wheel Selection

1.Material Compatibility:

The first step in selecting a grinding wheel is identifying the material composition of the workpiece. Different materials require specific abrasive types and bonding agents to achieve optimal results. For example, aluminum oxide abrasives are suitable for grinding ferrous metals, while silicon carbide abrasives are preferred for non-ferrous materials such as aluminum, brass, and ceramics.

2.Workpiece Geometry:

The shape and dimensions of the workpiece play a crucial role in determining the type and size of the grinding wheel required. Flat surfaces may necessitate large-diameter wheels with a wide contact area, while intricate contours and internal features may require smaller wheels with specialized shapes such as cup wheels or grinding cones.

3.Grinding Application:

The intended application of the grinding operation influences the choice of grinding wheel parameters such as grit size, hardness, and bond type. For rough stock removal, coarse grit wheels with softer bonds are preferred, whereas finer grit wheels with harder bonds are suitable for precision grinding and finishing applications.

4.Surface Finish Requirements:

The desired surface finish of the workpiece dictates the grit size and wheel hardness selection. Coarser grit sizes produce rougher surface finishes but facilitate faster material removal, while finer grit sizes yield smoother finishes but may require longer grinding times.

5.Operating Conditions:

Environmental factors such as machine horsepower, spindle speed, coolant availability, and operator skill level must be taken into account when selecting a grinding wheel. Higher horsepower machines can accommodate larger and more aggressive wheels, while slower speed machines may require softer wheels to prevent overheating and premature wear.

6.Safety Considerations:

Safety should always be a top priority when selecting and using grinding wheels. Ensuring compatibility with machine specifications, adhering to recommended operating speeds, and inspecting wheels for damage or defects are essential safety practices. Additionally, using appropriate personal protective equipment (PPE) such as safety glasses, gloves, and face shields is imperative to prevent injuries.

Selecting the right grinding wheel is a critical step in achieving optimal grinding performance and workpiece quality. By considering factors such as material compatibility, workpiece geometry, grinding application, surface finish requirements, operating conditions, and safety considerations, you can make informed decisions to maximize productivity and safety in your grinding operations. Remember to consult with grinding wheel manufacturer and industry experts for additional guidance and recommendations tailored to your specific needs.

2024年2月17日星期六

Sledge Hammers: A Comprehensive Guide

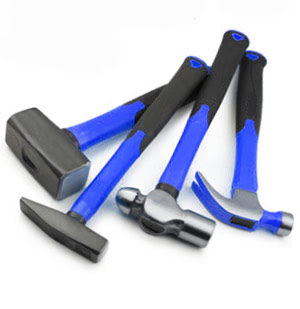
Sledge hammers, among the simplest yet most versatile tools in the toolbox, come in various shapes and sizes, all sharing one fundamental purpose: to strike with formidable force. In this guide, we'll delve into what sledge hammers are, their typical uses, and the different types available for various applications.

Understanding the Sledge Hammer

Sledge hammers are robust, long-handled striking tools designed to deliver substantial blunt force to a target area or object. These hammers are considerably larger and heavier than their counterparts meant for driving nails. Sledge hammers find their primary use in demolition or when the task demands driving objects that are too thick and heavy to be handled by a regular hammer.

To qualify as a genuine sledge hammer, it must feature a straight handle, designed to be swung with two hands, although smaller variations are wielded one-handed with sufficient arm strength. The heads of sledge hammers are almost always made of steel, typically flat on the striking face, allowing for maximum blunt force delivery to the target.

Versatile Applications of Sledge Hammers

Despite their simplicity, sledge hammers can be applied to a surprisingly diverse range of tasks. From rural homesteads in Northern Ontario, Canada to construction sites worldwide, these tools have become an indispensable part of daily life. Here are some of the most common uses for sledge hammers:

-Demolition: Whether it's drywall, concrete, wood, or any other material, sledge hammers are your go-to for dismantling.

-Splitting and Building: Driving steel wedges for splitting firewood or building stone structures is made efficient with a sledge hammer.

-Dislodging Stuck Items: When objects are stubbornly fixed in place, a sledge hammer can help free them.

-Fence Post Installation: Driving fence posts securely into the ground is a breeze with a sledge hammer.

-Metalwork: Straightening bent metal objects becomes simpler with the substantial striking force of a sledge hammer.


Types of Sledge Hammers

1.Standard Sledge Hammer: These versatile tools are used for a wide range of applications, from demolishing walls during home renovations to splitting firewood. They come in various lengths and handle weights, catering to specific purposes. The largest standard sledge hammers can exceed three feet in length and weigh up to 20 pounds, while the smallest are around 18 inches long and weigh two or three pounds. The heads of standard sledge hammers are cylindrical and flat or slightly rounded on both faces, and the handles are usually crafted from hardwood, although carbon fiber handles are becoming more common.

2.Engineer’s Hammer: These hammers resemble small standard sledge hammers, measuring 12 to 18 inches in length with flat, rectangular heads weighing between two and six pounds. Engineered for lighter demolition work and tasks like driving small-to-medium-sized spikes into wood or striking steel chisels against stone or wood, engineer’s hammers are versatile and wielded with one or two hands.

3.Post Maul: Post maul sledge hammers share an appearance with large, long-handled standard sledge hammers. However, they are specifically designed for driving fence posts and stakes deep into the soil. Featuring larger cylindrical heads, typically with perfectly flat, circular faces, post mauls make accurate striking as effortless as possible.

In conclusion, sledge hammers are simple yet powerful tools that have found their place in a wide array of applications. Whether you're a DIY enthusiast, a construction worker, or a homesteader, the right sledge hammer can make your tasks more efficient and less physically demanding. Understanding the types and their ideal uses will help you select the perfect sledge hammer for your needs.

2024年1月28日星期日

Essential Remodeling Tools for New Houses

Embarking on a home remodeling project is an exciting venture that promises to transform a new house into a personalized and functional space. Whether you're a seasoned DIY enthusiast or a first-time remodeler, having the right tools at your disposal is essential for a successful and efficient project. 

In this comprehensive guide, we'll introduce you to the essential tools needed for remodeling a new house, covering everything from demolition to finishing touches.

Tools for Demolition Phase

1.Crowbar and Pry Bar: These versatile tools are crucial for dismantling existing structures, removing old fixtures, and prying apart materials. A crowbar's leverage and a pry bar's precision make them indispensable during the demolition phase.

2.Reciprocating Saw: For cutting through a variety of materials such as wood, metal, and drywall, a reciprocating saw is a powerful tool that expedites the demolition process. It's particularly useful for removing walls, studs, or any unwanted structures.

3.Sledgehammer: When brute force is required, a sledgehammer is the go-to tool for breaking down walls, removing tiles, or taking on larger demolition tasks.

Remodeling Tools for Construction and Framing

1.Cordless Drill: A versatile and portable tool, a cordless drill is essential for a variety of tasks, including driving screws, drilling holes, and assembling furniture. Opt for a model with interchangeable bits for added convenience.

2.Circular Saw: Ideal for making straight cuts in lumber and plywood, a circular saw is indispensable for framing and general carpentry work during the remodeling process.

3.Level and Framing Square: Achieving precision in construction is crucial. A level ensures that surfaces are straight and even, while a framing square assists in maintaining accurate angles during framing tasks.

Surface Preparation

1.Paint Scrapers and Sandpaper: Preparing surfaces for painting or refinishing requires the right tools. Paint scrapers and sandpaper help remove old paint, smooth surfaces, and create an ideal foundation for a fresh coat of paint or new finishes.

2.Putty Knife and Spackle: These tools are essential for patching holes, filling cracks, and smoothing out imperfections in walls and surfaces before painting. A putty knife allows for precise application, while spackle is ideal for larger repairs.

Painting Tools for Remodeling

1.Paint Brushes, Rollers, and Trays: Achieving a professional finish during the painting phase requires quality brushes, rollers, and trays. Choose brushes with various sizes for different tasks and rollers suitable for the type of surface you're painting.

2.Painter's Tape: Ensuring clean and straight lines between different paint colors or sections is made easy with painter's tape. This tool is essential for achieving a polished and professional look in your remodeled spaces.


Safety Gear in House Remodeling

1.Safety Glasses and Dust Masks: Safety should always be a priority during remodels. Protect your eyes with safety glasses and wear a dust mask when working in dusty environments or when using tools that generate airborne particles.

2.Work Gloves and Ear Protection: Comfort and protection for your hands are essential during construction tasks. Work gloves provide a barrier against splinters and sharp edges. Additionally, if you're using loud tools like saws or drills, invest in ear protection to prevent hearing damage.

Equipping yourself with the right tools is the foundation for a successful house remodeling project. From the initial demolition phase to the finishing touches, each tool plays a crucial role in achieving a well-executed and satisfying result. Before you embark on your remodeling journey, ensure that your toolkit is well-stocked with these essential tools, allowing you to navigate the challenges and joys of transforming a new house into a personalized and revitalized home.

2023年11月27日星期一

What are the Uses of Rubber Mallet Hammer

Every seasoned craftsman and DIY enthusiast understands the importance of having a well-equipped workshop. Among the many tools that line the shelves and workbenches, the rubber mallet hammer stands out as a versatile and indispensable companion. This seemingly simple tool serves a multitude of purposes, making it an essential addition to any workshop. 

In this article, we'll explore the versatility and significance of the rubber mallet hammer, shedding light on the myriad of tasks it can tackle.

Understanding Rubber Mallet Hammer

Before we dive into its many uses, let's get to know the rubber mallet hammer a bit better. This tool typically consists of two primary components:

1.Handle: The handle of a rubber mallet is commonly made from wood or fiberglass, ensuring a comfortable grip and precise control. The handle length varies, allowing for different striking angles and levels of force.

2.Head: The head of a rubber mallet is what sets it apart. It's composed of a solid rubber material that covers the striking surface. The rubber head comes in various shapes, such as cylindrical or rectangular, and in different hardness levels to suit various applications.


Applications of Rubber Mallet Hammers

1.Woodworking: Rubber mallets are invaluable in woodworking for a range of tasks. They are often used to gently tap wooden joints together without damaging the wood. Additionally, they are employed for assembling furniture, adjusting woodwork, and setting dowels, ensuring a snug fit without causing dents or scuffs.

2.Tile Installation: When it comes to laying tiles, especially delicate or glass tiles, a rubber mallet is the tool of choice. It helps to even out tiles and ensure they are level while minimizing the risk of chipping or breaking.

3.Auto Body Repair: In the automotive world, rubber mallet hammers play a crucial role in auto body repair. They are used to reshape and manipulate metal panels without leaving marks or scratches. Auto body professionals rely on rubber mallets to restore the original contours of vehicles.

4.Leatherworking: Leatherworkers utilize rubber mallet hammers for tasks like punching holes, setting rivets, and stamping designs onto leather. The soft striking surface ensures precise and controlled results.

5.Metalwork: Metalworkers appreciate rubber mallets for their ability to shape and form metals without marring or damaging the material. They are employed for bending, stretching, and aligning metal components.

6.Jewelry Making: Delicate jewelry-making tasks, such as setting gemstones or shaping metal components, require precision and a gentle touch. Rubber mallets are the perfect choice for these intricate processes.

7.Carpentry: In carpentry, rubber mallets are used for assembling and disassembling wooden components. They are particularly useful in fine carpentry and cabinetry.

8.DIY Home Repairs: For various home improvement projects, a rubber mallet is a valuable tool for tasks like assembling furniture, making adjustments to doors, and working with delicate materials.

Advantages of Rubber Mallet Hammers

The rubber mallet's versatility and usefulness can be attributed to several key advantages:

Non-Marring: The soft rubber head ensures that the striking surface won't damage the material being worked on, making it suitable for various tasks.

Controlled Force: The user can apply controlled and precise force with a rubber mallet, making it ideal for fine or delicate work.

Reduced Vibration: The cushioning effect of the rubber head minimizes shock and vibration, resulting in less hand fatigue during prolonged use.

Noise Dampening: Unlike metal hammers, rubber mallets generate less noise when used, making them suitable for indoor projects and shared workspaces.

Wide Range of Hardness: Rubber mallets come in various hardness levels, allowing users to select the appropriate tool for their specific needs.

In short, with its gentle and precise strike, the rubber hammer is an indispensable tool for a wide range of applications. When working with wood, metal, tile, leather, or any other fine material, the rubber hammer gets the job done with precision and finesse.