2021年10月25日星期一

What Are Some Safety Tips For Using Gear Pullers?

Gear pullers come in various shapes and sizes and have a wide range of uses. Use the right tools when working.

Wear safety glasses or goggles, or a face shield (with safety glasses or goggles).

Choose the right gear puller for each job. Always use a gear puller of the required size or larger. If possible, use a three-jaw puller.

Make sure that the gear puller is aligned with the shaft and close to the part to be removed. The jaws should be parallel to the screws. This ensures direct pull.

Be careful when removing stubborn gears or bearings. Be sure to flatten the head of the center screw. If the gear or bearing is still stuck there after two sharp blows, choose a larger puller and continue to remove the gear or bearing.

Use a protective cap or detachable point to protect the screw from mushrooming or splitting.

If the gear puller starts to deform, stop working.

Cover the work with a cloth to protect you and bystanders from flying parts.

Before use, lubricate the center screw with engine oil.

The gear puller should be cleaned after use and stored in a dry place.
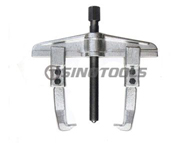

Gear puller


What are some things that I should avoid doing?

Do not use air-powered tools on gear pullers.

Do not use any pullers with functional parts that are excessively worn, dented, or cracked. Check the center screw for signs of wear or seizure.

Do not heat any gear puller. If heated, it loses its strength and breaks under pressure.

Do not cut or grind any part of the gear puller.


How to use a gear puller

Nothing can turn a small thing into a big one like not having the right tool and project turning into a catastrophe. Many components on the engine, transmission and transmission system are installed in a press-fit or interference fit situation where the part fits so tightly it must be pressed on. This means that when you need to disassemble gears, pulleys, bearings, etc., it may require extreme force to make the part slip off or leave its place. This is the importance of having the right tools for the job.

Most bearing or gear pullers have similar designs, they have 2-4 jaws hooks or loop ends, which can hook the items behind you want to remove, and have a center bolt or pin that can tighten down on the center of the shaft. When you tighten the bolt or pin, it pulls the bearings, gears, pulleys, etc. evenly, as if it were installed.

Clean the area-In this job, the biggest mistake you can make is to directly remove the part without cleaning the hole around the part or where the part is located. First, use compressed air and a degreaser to remove all debris from the area where the parts will slide when you pull. Also, check the area for rust and remove it with sandpaper or similar abrasives.

Install the tool-first pass the center pin out so that there is enough space for the arm of the puller to hook behind the part you want to remove. Then find the arm behind the part and tighten the center screw until the pin touches the center shaft. Most manufacturers have designed a dimple on the central shaft so that the tool can ride in it and make sure the pin is located in that recess.

Pull the part off-once you have some pressure on the central shaft to tighten it, you may not see the bearings, gears, or pulleys moving visually. Do not tighten the puller excessively, otherwise, it may cause damage. Instead, first, tighten it down with a wrench or ratchet by hand until it is very tight. Then take a hammer tap around the opening or the central shaft, or the part to help vibrate it lose.

If the parts are not loose, you may have something that is very stuck, and you may need to introduce heat.

If you cannot fully the arms of the puller behind the part, it is not common to modify or clear the arms to make them in a narrow area. Be careful not to take away too much material, because it will reduce the integrity of the arm and also will most certainly void your warranty! We are Gear puller suppliers. Please feel free to contact us if you are interested in our products.
2021年10月16日星期六

What Is a Spring Clamp?

The spring clamp is a quick and simple clamp that uses the pressure of a spring to hold down the material. It is usually used to cut, fasten, or bond materials. There are many useful options when it comes to clamps for your project. Each clamp has a specific purpose and function, which separates it from the others.

What is a spring clamp? A spring clamp is a clamp that uses the pressure of a metal spring to press the two ends to press the material. It is usually used for clamping wood, metal, plastic, and fabric with a single point of pressure. They work great for clamping stop blocks on fences or jigs, clamping power cords up out of the way, fast and easy clamping, and for gluing woodworking projects.


What is a spring clamp?

A spring clamp is a clamp that uses the pressure of a metal spring to clamp down two ends to firmly support the material. They are quick and easy to use for any skill level to help glue, fastening or cutting materials. The size of this clamp is small, but it is actually very powerful, which makes it one of the first types of clamps collected by most woodworkers. The jaws of the clamp usually have plastic or rubber pads to protect the material you are working on from damage.


What are spring clamps used for?

Spring clamps are commonly used to clamp wood, metal, plastic, and fabric with a single point of pressure. Their work is great for clamping stop blocks on fences or jigs, clamping power cords, fast and easy clamping, and gluing woodworking projects.


Are spring clamps safe?

The spring clamp is very safe. They have a fast and easy loading and release action and can use any level of carpentry.


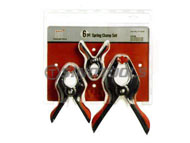
spring clamp


How to measure spring clamps?

The spring clamp is the length from the claw to the end of the handle. This measured length will classify the size of the spring clamp. These sizes range from 3/4 inches to 9 inches or larger. The most common size is a 6-inch spring clamp. The amount of jaw opening is called the clamping force.


How to use a spring miter clamp?

Spring miter clamps are equipped with pliers inserted into the pliers to open and close the jaws. To close them, apply glue to the joints and place the pieces. Use pliers to open the jaws and position the clamp center on the depth of the miter. When released the pronged ends grabs the wood as the spring tension closes the joint. These are great for closing miter joints during glue-up.


How do spring clips work?

A spring clamp is a clamp that uses the pressure of a metal spring to compress both ends to firmly support the material. They are quick and easy to use for any skill level to help with gluing, fastening, or cutting materials.

We are spring clamp suppliers. Please feel free to contact us if you are interested in our products.
2021年10月8日星期五

What Are The Basic Skills When Using Hand Tools?

Ensure that employees receive the appropriate training in the safe use of hand tools.

Training is often provided to teach them how to choose the right tool, how to use each tool correctly, and how to identify when a tool needs repair.

Choose the right tool for the job. Alternatives increase the chance of accidents.

Use tools that keep your wrists straight. Avoid using hand tools with bent wrists.

Use high-quality tools.

Keep the tools in good condition at all times.

Check the tool for defects before use. Replace or repair defective tools.

Keep the knives sharp and cover the sharp edges with suitable coverings to protect the tools and prevent accidental contact injuries.

Replace broken or damaged handles on documents, hammers, screwdrivers, or sleds.

Make sure that the handles of tools such as hammers and axes fit tightly with the tool heads.

Replace worn jaws on wrenches, plumbing tools, and pliers.

Correct the burr or mushroom-shaped head of the beating tool.

Pull a wrench or pliers. Don't use force unless you hold the tool with your hands spread out.

Sharp tools (such as saws, chisels, knives) and handles placed on the bench far away from the aisle should not extend beyond the edge of the top of the bench.

Maintain tools carefully. Keep it clean and dry, and keep it properly after each use.

Pack the tools in a sturdy toolbox to and from the workplace.

Wear safety glasses or goggles, or a face shield (with safety glasses or goggles) and suitable gloves to accommodate the hazards you may be exposed to when doing various tasks.

Keep the working environment clean and tidy to avoid confusion and accidents.

Use a heavy belt or apron to hang the tools by your sides, not behind your back.

Keep your workspace clean and tidy. Store tools properly when not in use.

What should I avoid when using hand tools?

Don't use tools for work they don't intend to do. For example, don’t use a screwdriver as a chisel, crowbar, wedge, or punch, and don’t use a wrench as a hammer.

Do not apply excessive force or pressure to the tool.

Do not cut to yourself when using the cutting tool.

When using a cutting tool or screwdriver, do not hold the cutting board with your hands. Put it on the workbench or in a vise.

Do not wear heavy gloves when operating hand tools.

Don't throw tools. Give them directly to other workers and deal with them first.

Do not carry tools that hinder the use of your hands, and do not use them on ladders, buildings, or when doing any dangerous work. If working on a ladder or scaffolding, tools should be raised and lowered using buckets and hand ropes.

Do not carry sharp tools in your pocket.

Do not use tools during electrical work unless they are designed for electrical work (for example, properly insulated).

Do not leave tools lying around on elevated structures, such as platforms or scaffolding, to prevent the tools from being hit or dropped.

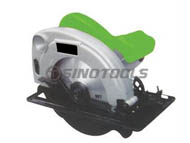
Hand Tool

Hand tool