2021年9月30日星期四

Proper Use of a Hammer

Many of the tools in the merchant’s toolbox are designed to "take a beating"; the hammer falls into this category by definition and is the basic tool of any toolbox.

The history of the hammer can be traced back to ancient times when the Romans also invented the forged iron nail. The Romans invented the claw hammer as a dual-purpose tool for beating and pulling nails.
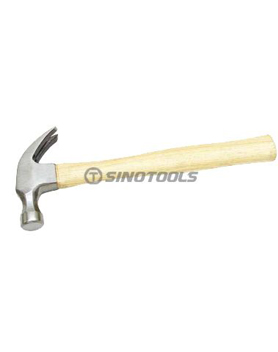
Hammer

hammer

A hammer is a simple design tool consisting of a hammerhead and a hammer handle.

Considering its simple design and widespread use, untrained users may think that using a hammer means hitting the work until the work is completed. This "novice technique" often leads to arm fatigue, unnecessary injuries, and serious injuries.

Professionals are able to select and use the correct hammer for the task and use it to repeat without tiring their arms.

The following steps should be able to achieve high-quality "hammering" work:

Hold the handle firmly. For tasks that require more effort, hold the end of the handle; for tasks that require more control and precision, hold the handle closer to the hammerhead.

Make sure that the hammer surface is always parallel to the surface being hit.

Swing from the elbow for power and from the wrist for control.

Let the weight of the hammer do all the work; with the correct choice of the hammer, there is no need to use your own power to perform the task.

Focus on the piece being hammered, not the tool.

Use smooth, repetitive blows; avoid side blows or side blows, so as not to damage the workpiece or the surface being hit.

How to drive a nail

When drilling nails into hardwood, it is good practice to drill a pilot hole before you start hammering the nails. This method makes hammering easier and prevents wood splitting.

Step 1:

Clamp the hammer in the middle of the handle, and use the thumb and index finger of the hand not holding the hammer to clamp the nail near the top. If the nail is too small, use a piece of cardboard to clamp it, while you must clamp the cardboard.

Step 2:

Tap the nail until it sinks enough to stand on its own.

Step 3:

Using the center of the hammer face, drive the nail in with a smooth hammer. Let the weight of the hammer work. The hitting surface should always be parallel to the hitting surface.

Hammer safety precautions

If used improperly, a hammer can become a very dangerous tool. Follow the suggestions below to avoid harm to yourself and the people around you:

Use the correct hammer. Take a moment to learn about the different characteristics of each model, head weight, or seek professional advice related to your application.

Choose a hammer (for example, nails, chisels, punches, wedges, etc.) whose striking face diameter is approximately 12 mm (0.5 inches) larger than the face of the object being struck.

When using a hammer, be sure to wear protective equipment (safety glasses, gloves, or face shield).

Always keep the hitting face parallel to the hitting surface. Avoid glancing or side blows.

Never use a hammer with a damaged head, as it will damage the workpiece being processed and cause injury.

Never use a hammer with a loose or broken handle. The head may fall off the handle and cause injury.

We are hammer manufacturers. Please feel free to contact us if you are interested in our products.
2021年9月22日星期三

Clamp

Although clamps are popular among carpenters and hobbyists, they are not a common household tool.

What is a clamp?

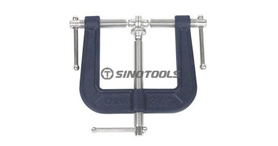
The clamp grips other objects tightly. Clamps are very useful when clamping or sticking to wood, paper, plastic, or some metal materials. A paper clip is a simple clamp. There are many types of clamps to choose from. The C clamp is useful to clamp wood or metal; the hand screw is used to clamp angled wooden products; the clamping pressure is small when the spring clamp is glued; the bar and pipe clamp can fix larger parts; the net clamps tighten around large materials with a soft nylon webbing. Most clamps have an end face and an adjustable screw. Some, such as hand screws, have two screws.

How to use clamps safely

To use clamps safely, first determine which clamps are needed for the job. Then make necessary adjustments to the screws to fit the object. The spring clamp only needs to apply pressure on the handle to open the jaws of the clamp. Close the jaws around the object by turning the screw or releasing the handle. For safety, make sure that your fingers and skin are not pinched by the frame, screws, or jaws.

How to maintain the clamp

The clamps are simple to operate and usually do not require maintenance unless they are poorly constructed or abused. Depending on the complexity of the wear-prone parts, special clamps may require some maintenance.

Tools related to the clamp

Other useful grasping tools include pliers.

Not what you want? Try these:

Home repair tools: Whether you like to use the Yellow Pages to repair anything in the house, or think that you are a person who often does it yourself, here are some tools that everyone should have in their toolbox.

Fasteners: Fasteners, such as nails and screws, used to connect two things together.

Pliers: Get a grip on pliers by learning this useful home repair tool. You can only find tips on using and maintaining pliers.

We are clamp suppliers. If you are interested in our products, please feel free to contact us.

Clamp

2021年9月14日星期二

Points To Note When Choosing a Glue Gun

Points To Note When Choosing a Glue Gun

Check the lever.

Squeeze the manual trigger with a manual caulking gun and insert the lever into the back of the caulk tube, which in turn pushes the caulk out of the tip of the tube. There are two main types of guns with slightly different performances.

Ratchet: A sewing gun with a ratchet lever (a serrated lever that can be "grabbed" by each hand), inexpensive, and suitable for light duty. The biggest problem with ratchet levers is that the sealant will seep until you twist the end of the lever and pull it back to release the pressure. This may cause confusion and result in the wastage of sealant.

Smooth slider: After applying the sealant with a smooth slider caulking gun (often advertised as "no dripping"), press the thumb lever to release the pressure on the sealant.

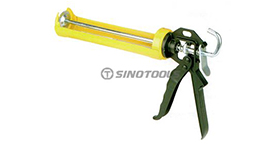
A caulking gun is a tool used to hold a tube or box filled with materials used to seal gaps and malfunctions in the home. The caulking material can be made of silicone or latex and is used to bond various materials such as metal, glass, wood, and ceramics. The caulking material is usually placed in the pipe. You will need a caulk gun to remove the caulk from the tube. The gun can not only help you adjust how much filler to release at a time but also allows the filler to appear where you want it.

We are Glue Gun Suppliers. If you are interested in our products, please feel free to contact us.

Glue Gun

2021年9月6日星期一

The Way To Remove Rust From Hand Tools

Method one: scour, scrape, and sand

If you don't mind putting in a little elbow grease, the rust can be removed by physical wear and tear. When dealing with mild to moderate surface rust, choose effective scrubbing materials. Deeper corrosion problems may not only require muscles, but this physical solution is a good first step.

Step 1: Use detergent to remove dirt and grease.

First, wash the rusty tools with soapy water to remove dust and grease. Then, rinse the tool with water and dry it thoroughly.

Step 2: Sand the rusty tools with sandpaper.

For mild rust, scrub the surface with a clean cloth, sandpaper, or steel velvet. Always start with the coarsest abrasive to remove accumulated rust and pitting corrosion, and then switch to finer gravel to smooth the grooves caused by coarse gravel. If you still see rust, it's time to take more stringent measures.

Step 3: Use the bit-driven steel wire wheel to polish the stubborn rust.

For more serious rust problems, kerosene, such as cutting lubricants, can be used on the surface of China hand tools. Wait for a moment. Then connect the wire wheel to the drill to remove stubborn rust. Finally, use fine sandpaper to remove the remaining residue. If the surface rust disappears, your job is complete. However, if the problem persists, stronger chemical solutions may be required.

Method two: soak with oxalic acid

When you want to save some energy, oxalic acid provides an effective chemical-based treatment for mild to moderate rust. This mild acid directly enters the joints and crevices and penetrates the problem areas, making it particularly suitable for removing rust from confined spaces and difficult-to-clean areas. Buy a cheap chemical from your local household goods store and start using it.

Step 1: Use dishwashing liquid to clean rusty tools.

First, before starting, clean the tools with detergent and water to prevent grease and dirt from blocking the chemical process.

Step 2: Put on protective equipment and immerse the rusty tools in the oxalic acid solution.

Before taking out any chemicals, don't forget to wear goggles and rubber gloves to protect yourself. Please protect your eyes and hands from acid damage. Although it is a weak acid, be sure to work in a well-ventilated area and avoid smoking. You can open the door or window, if you have a fan, turn on the fan. Mix three tablespoons of oxalic acid with one gallon of water in a plastic container large enough to soak the hand tools you want to wash. Then, put the tool in the solution, making sure it completely covers the tool.

Step 3: Soak the tool for 20 minutes.

Put the garden hand tool in the solution for about 20 minutes, or until the crust disappears. (Depending on the corrosion situation, you may need more or less time.) When using oxalic acid, there is no need to scrub the rust. Acid can play a full role in removing rust. Then, rinse, dry thoroughly, and save the tool again.

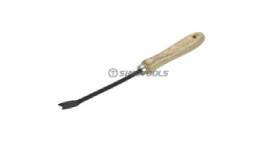
Garden Hand Tools