2021年12月29日星期三

The Importance Of Non-Sparking Tools


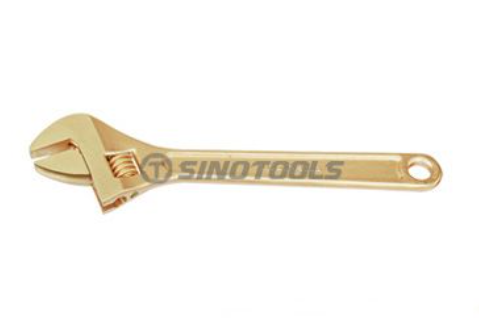
Non-Sparking Adjustable Wrench


In specific settings, common hand tools can produce sparks that can threaten all employees in the facility. Non-sparking tools that do not include ferrous metals must be utilized. In these scenarios, it is unimaginable to make use of traditional hand tools, as well as non-sparking tools that do not include ferrous metals need to be made use of.


Where to use non-sparking tools?

In general, non-sparking tools should be used in any environment where ignition sources are a concern. Applications include:

1. work in confined spaces Chemical, petrochemical, and gas operations

2. City, State, and Federal Governments (utilities, waste management, hazardous material response, weapons of mass destruction)

3. Collection, holding, and transfer of flammable liquids

4. Work in confined spaces

5. Transportation (airports, railroads, tanker trucks, shipyards)

6. Hot work

7. Maintenance and repair operations in environments that may contain flammable liquids, vapors, or combustible dust or residues


If you do not use non-sparking tools in hazardous environments

Frictional ignition can occur with tools. Steel alloys associated with chrome vanadium can actually produce hot sparks and a high risk of ignition as they can ignite flammable substances in the air for a few moments. This can lead to fires or explosions, endangering the lives of everyone in the workplace.


The proper way to use non-sparking hand tools

1. We must always remember to sharpen all spark-proof tools regularly according to normal safety procedures, thus protecting the eyes and face, and to collect the powder with the appropriate tools.

2. The premises must be ventilated to remove potentially harmful powders and vapors from the air.

3. Always ensure that all spark-proof tools are thoroughly cleaned and free from rust or ferrous contaminants, which may render the anti-detonation properties of your spark-free tools ineffective.

4. You must always remember not to bring them into direct contact with acetylene, which can produce highly dangerous explosive acetal in wet conditions.

By following these few simple rules, you will ensure that you always have clean and functional tools and minimize possible hazards in the workplace.


We are a non-sparking tools supplier, please feel free to contact us if you need them.
2021年12月19日星期日

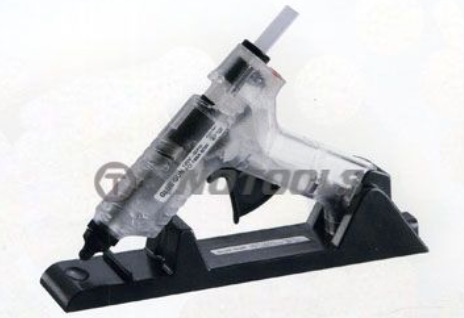
How To Control The Waste Of Gluing With a Glue Gun?


How To Control The Waste Of Gluing With a Glue Gun?


When using a glue gun, there are often cases of glue hitting too much. How to reduce the waste of gluing? Read on for more information.


Recycling of glue


Each project has its own characteristics. After the surface glue on the board is beaten, the glue is scraped and replenished. It is observed that the actual utilization rate of each glue is less than 60%, and the remaining glue is scrapped in a big pile. The remaining glue can be recycled: according to each project, the use of different ways and methods need to be considered.


Equipment


The manual glue gun is controlled by a person, so there is some control over the amount of glue coming out of the gun. It will also avoid many factors that lead to glue repair. The hand glue gun is more economical compared to the pneumatic glue gun. But the efficiency will be reduced. If the production cycle of the project allows, it is recommended that the surface glue of the board be played by a manual glue gun.


Accessories


Foam sticks, the design gives the theoretical size of foam sticks according to the drawing. However, various errors or other factors lead to the installation of foam rods of unsuitable size, too big, or too small. Workers will be installed according to the drawings, too small size of the foam stick will increase the amount of glue. It is recommended that the design of each project should indicate the size of each seam on the slab and the size of the selected foam rod on the top of the drawing. Also, the project manager of each project should arrange for someone to check the size of the foam rods on each part when assembling the first layer or the first floor. The process should also communicate more with the assembled workers, and their opinions or suggestions will be of great help to the smooth running of the project as a whole.


Gluing workers


A professional gluer will be more proficient in operating the gluing equipment and forming the product at once. There is no need for redundant glue, glue repair, and other steps, from the approach has begun to save. Of course, professional curtain wall workers should be developed in many aspects, diversified training. But it is necessary to cultivate more professional and skilled glue-beaters on this basis. The mobility of factory workers is too great, and whether such workers can be retained is also a constraint.


We are a glue gun supplier, please feel free to contact us if you need them.
2021年12月11日星期六

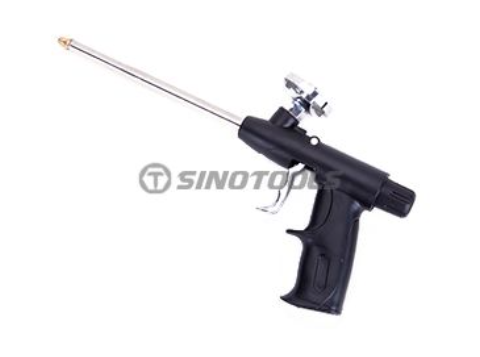
How does a Foam Gun Work?


How does a Foam Gun Work?


What is a foam gun?


You've seen those pictures of autos trickling with thick, white, cutting cream-like foam and also you've commonly asked yourself: "Just just how exactly do they do that?" The key is a foam gun! A foam gun is a piece of car and truck washing equipment that mixes the ideal amount of car clean soap, water, and also air to generate thick suds, after that fire them throughout your auto making use of the power of a stress washing machine.


How does it work?


Mix 1-- 3oz of your favored soap and water right into the canister of the foam gun. We always utilize cozy water because it aids the aerate combination better. Reattach the cylinder to the head of the foam gun.


After adding soap and also water to your foam gun cylinder, just reattach it to your pressure washing machine lance, obtain splashing! Every foam gun includes a flexible dial so you can tweak your foam to the perfect quantity for your degree of unclean. From unclean off-roader to the mild no-touch-wash, there makes sure to be a setting for you!


How to clean the vehicle with a foam gun?


Usually, we like to put down a thick layer of suds over our cars and truck, and after that wash, it off prior to even going at it with our gloves. Simply coat your auto, enable the foam to sit for a few minutes, as well as allow the large power of costs soaps and gravity to help you. See as the dust and gunk slide off your vehicle like magic. Then, wash our cars and truck off with simply water. This straightforward step helps decrease the possibilities of setting up wash-induced scrapes and swirls.


Now, time for the enjoyable step once more: reframing your auto! Spray an additional layer of very thick cars and truck clean foam on your ride once more. You can even play it in if you want! Simply do not neglect to make use of a laundry glove to scrub off the remaining dirt as well as particles. Utilize the two pail technique to additionally prevent swirls as well as scrapes. If you have actually never heard those words "two container technique" before, you'll definitely want to click this short article to learn precisely what it is.


After scrubbing, ensure to rinse your car once again to rid your cars and truck of the continuing to be dirt and bubbles. Ultimately, completely dry your vehicle with an incredibly soft towel as you would throughout any other wash.


We are a foam gun supplier, please feel free to contact us if you need them.
2021年12月4日星期六

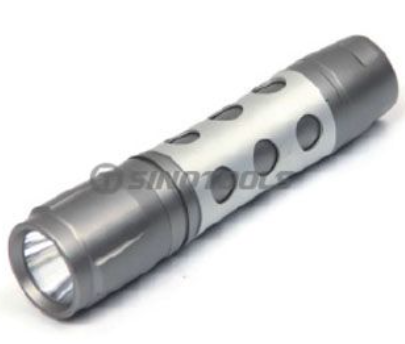
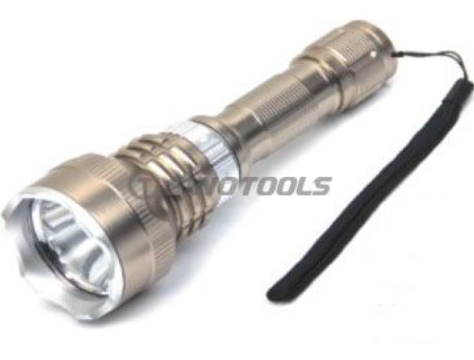
How To Choose LED Flashlight?


LED Flashlight


In daily life, we need to use LED flashlights whether in work or life. First of all, it should be clear that the flashlight we choose is mainly used for what? Because different types of flashlights have different uses. Choose the right flashlight will play a maximum role in different application scenarios. So how to choose a suitable led flashlight for you? Today in the article, we will briefly introduce what you need to pay attention to when choosing a LED flashlight.


1. LED flashlight brightness

Flat avenue walking on the brightness requirements are not high, a power of more than 1W AA flashlight will be sufficient. If you use a rechargeable 14500 battery, then use the power of a larger.


2. LED flashlight price

According to personal economic strength, the general choice of low-cost led flashlight will be enough.


3. LED flashlight battery life

The pursuit of high brightness, with 18650 lithium batteries. Power 3W, the current 750MA flashlight is enough to use. Endurance time in three hours

Rechargeable 14500 batteries, discharge current of about 2A, the endurance time of about 1 hour

The high-quality capacity of 2200MAH alkaline AA batteries, discharge current of about 1A, the battery life of about 2 hours. If you use 2A current discharge is very uneconomical, often only high light for more than half an hour; best with 500MA current discharge, the endurance time can reach about 2 hours.


4. Outdoor led flashlight type

18650 straight tube: high power, high brightness, about 3 hours of battery life.

Larger power AA tube: batteries can be bought everywhere, easy to carry, about 1 hour of endurance.


5. Requirements to achieve the appearance of the treatment

Depending on personal preference.


LED Flashlight


6. LED flashlight with what circuit

18650 cartridge is best to use the 7135 constant current circuits, not recommended to use the boost circuit. The reason is that the 7135 circuit is the most stable and efficient. 7135 constant-current circuit is the disadvantage that when the voltage is low to a certain level, the more you use the lower the brightness. This disadvantage does not affect much when walking. For AA flashlight, that can only use the boost circuit. It is best to use good quality and high efficiency to save power to achieve the purpose of extending the endurance.


7. require waterproof performance

Can prevent heavy rain can be.


8. LED flashlight light color

In the case of dry roads with white LED on the line. If it is a mountainous area or in a slippery situation, it is best to use warm white or natural white LED to increase the color rendering. At the same time, there can be more powerful flashlights on the high-power flashlight, after all, safety is most important.


9. Flashlight circuit to what gears

High, medium, flashing three gears are more practical. Burst flash is mainly used to remind people and cross the road.


Like outdoor sports friends will often use LED flashlights, it can not only help us light but also protect our safety in the outdoors. We are a LED flashlight supplier, please feel free to contact us if you need them.
2021年11月26日星期五

4 Buying Tips To Help You Choose a Suitable Circular Saw Blade


Saw Blade

Diamond Saw Blade


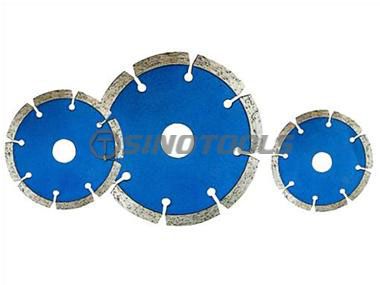
Circular saw blades are widely used in the processing of wood, plywood, MDF, artificial marble, plastic, aluminum, and other materials. The right circular saw blade will improve product quality, shorten the processing cycle and reduce processing costs.

Circular saw blade material

1. Alloy tool steel

Compared with carbon tool steel, it is more wear-resistant and has better processing performance. The heat deformation resistance temperature is 300℃-400℃, which is suitable for manufacturing high-grade alloy circular saw blades.

2. High-speed tool steel

It has good hardenability, hardness, and stiffness. Poor resistance to heat deformation, it is ultra-high-strength steel. Stable thermoplasticity, suitable for manufacturing high-grade ultra-thin saw blades.

3. Carbon tool steel

High carbon content, high thermal conductivity. But subject to 200 ℃ -250 ℃ temperature, its hardness and wear resistance drops sharply. Heat treatment deformation is large, with poor hardenability. Economic material for tool manufacturing.

4. 65Mn spring steel

Good elasticity and plasticity, material economy. Good heat treatment hardenability, its low heat temperature, easy to deform. It can be used for saw blades that do not require high cutting requirements.


Selection of saw teeth

Carbide inlay saw teeth have great influence on sawing performance. Tungsten cobalt carbide has better impact resistance. It is more widely used in the material processing industry. Cobalt content increases, the impact toughness and bending strength of the alloy have improved. But the hardness and wear resistance has decreased, according to the actual situation to be selected.


The number of teeth of a circular saw blade selection

Generally speaking, the more teeth, the more cutting edges in the unit time, the better the cutting performance. However, the number of cutting teeth requires more carbide, the price of the saw blade is high. The saw teeth are too dense, the chip capacity between the teeth becomes smaller, and it is easy to cause the saw blade to heat up. In addition, too many teeth, when the feed is not properly matched, the amount of cut per tooth is very small. It will intensify the friction between the edge and the workpiece, affecting the service life of the blade. Usually, the tooth spacing is 15-25mm, which should be based on the material sawed to choose a reasonable number of teeth.


Saw blade outside diameter selection

Saw blade diameter and the sawing equipment used and the thickness of the sawed workpiece. Under the same working conditions, a small diameter circular saw blade has a reduced power encounter angle that can reduce cutting power consumption. Reduce the amount of feed per tooth can improve the cutting quality. Reduced sawing volume can reduce wood and energy consumption. Improve the dynamic stability of the saw blade.

So, from the aspect of improving the stability of the saw blade and reduce sawing loss, etc., in order to meet the requirements of the sawing thickness, the smaller the diameter of the saw blade the better. That is, the small diameter of the saw blade can meet the requirements of the sawing thickness, do not unnecessarily increase the diameter of the saw blade.


We are a Circular Saw Blades supplier, please feel free to contact us if you need them.
2021年11月18日星期四

Maintaining Your Garden Hand Tools


Hand Transplanter

Hand Transplanter


If your garden tools are properly maintained, your work efficiency will be higher and you will save more money in the long run. It is always a waste to leave your equipment in a degraded state because if your equipment is degraded to a certain degree, all kinds of equipment cannot be restored to their original state, you have to buy new ones.


Before maintaining

Before giving advice on maintaining garden tools, we will provide some important shopping hints.


1. The first thing to check for new equipment is to see if the handle has been attached firmly. Try twisting or moving the handle of the socket to see if there are any obvious gaps. Check the thickness and texture of the steel parts.


2. Also, look for a good brand and find out where the implementation is made. If you observe a gardening tool carefully, you should not have any difficulty in judging whether it is qualified or not. Please note that some tools manufactured today look like someone wrapped a piece of tin around a stick.


3. After purchasing soil cutting equipment such as a hoe, shovels, or shovels, you may need to sharpen them. You should not waste time trying to chop off hard roots with a dull hoe or spade, because these can easily sharpen yourself. You only need a 12-inch mile file.


4. To sharpen a hoe, you must first study the bevel of the hoe's blade. Then place the file on one end of the inclined plane, push it away from you, and moving across the bevel toward the cutting edge. Carefully hold the file on the bevel so that you can follow the correct angle. Stop after a few strokes to see if the file has removed some shiny areas of metal. You can tell when the blade becomes thinner, and once you have the right "feel", you can continue to sharpen the blade. The way to sharpen a shovel is to place the mile file behind the blade of the shovel or put your foot on the side of the shovel facing you, and then sharpen it like a hoe. The trowel can also be sharpened like a spade. You can thin the file with a few strokes in the direction of the cutting edge, which makes your gardening easier.


How to maintain garden tools

1. Try not to leave your gardening tools outdoors for a long time, because they will quickly succumb to the natural environment.


2. Tools that are properly kept indoors can be used for a lifetime. Rain and humidity will rust steel and wood, and strong sunlight will dry out any type of wood. These outdoor factors can quickly cause your tools to deteriorate.


3. Put your tools in the shed or garage, hang them between the nails or pegs on the wall, with the blade or a working part turned up.


4. Stacking hoes and shovels on walls or in corners are harmful because it can bump or rub together, scratch and scratch the blades, and twist the handles.


5. When storing the appliance for a long time, the wooden handle should be smeared with linseed oil.


6. If the wood is already dry or has a lot of scratches or worn areas, you can use a mixture of 75% linseed oil and 25% turpentine for easier penetration. Using a rag to quickly apply linseed oil to the wood will also help to work better.


7. During the storage of tools, the oil will dry out, preventing any future damage caused by sunlight, moisture, sweat, or abrasion.


8. To handle and maintain blades or steel parts, just save some used oil and pour it into a big bucket of sand. Then insert the steel part of the tool into the bucket and move it up and down.


9. The abrasive effect of sand can remove any rust and polish steel, while oil can penetrate and prevent future rust.


10. Occasionally you may need to replace a broken or damaged handle, but separating the handle from the steel may be a problem. To remove the jammed handle, just put it in a bucket of water with the water level covering the wooden part of the steel, and then let it soak for about 24 hours. This will swell the wood. Later, when you take out the tool and let it dry completely, the wood will shrink and you can easily remove the handle. To speed up the drying process, place the tool near the stove or heater.


11. Before using the new handle, wipe it with linseed oil before inserting it into the steel part. After installation, if the handle has not been painted, you can wipe the entire length with more linseed oil. Then put the steel part in the oil sand bucket and quickly polish it, and you can start gardening seriously again.


We are a garden hand tools supplier, please feel free to contact us if you need them.
2021年11月10日星期三

Hand Tool Safety

Hand tools are a fundamental aspect of many businesses and institutions. However, hand tools can also cause many injuries to workers.

The cause of hand tool injuries can often be traced to some type of improper use or maintenance of hand tools. The following information focuses on the safety of non-powered hand tools. Please continue to pay attention to other safety precautions and learn about the safety tips of hand tools and other specific tools. Some ways to avoid hand tool injuries include:

Use the right tools. Examples of misuse of tools include using a wrench as a hammer, pliers as a wrench, a knife as a saw, a claw hammer as a ball hammer, a screwdriver as a chisel, and so on.

Make sure you have the correct size tools, such as the correct screwdriver, pliers, wrench, scissors, etc.

Individuals who use tools should receive training in basic safety and proper use of tools.

Keep the tools in good condition. Damaged or worn tools (such as broken or worn jaws of wrenches, power tools with broken plugs, etc.) should be repaired or discarded immediately. Report the defective equipment to your supervisor.


Hand Tool


The way the tool is used, they intend to use (for example, move the wood chisel outwards, away from your body).

When using the knife, cut away from your body, keeping your hands and body away from the knife.

Be careful with tools around electrical equipment. Only trained and qualified personnel can work on electrical equipment.

Store the tools in a safe place. Many accidents are caused by tools falling from the top of the head, or by putting sharp tools in a pocket or in a toolbox with the blade exposed. After use, make sure that the tool is placed in an appropriate place, and the sharp edges or blades are protected or enclosed to prevent contact.

Make sure that the tool handle is clamped on the heads of all tools.

Hand tools, such as chisels and punches, form mushroom heads during use and must be repaired or replaced.

Keep the cutting edge of the tool sharp so that the tool can move smoothly without being tied or skipped. Blunt tools may be more dangerous than sharp tools.

When using hand tools, keep a good grip and stand in a balanced position to avoid sudden slips.

Wear gloves when necessary to protect your hands. However, when using power tools, be careful of gloves and/or loose materials, as they may be caught by moving parts.

Wear other necessary personal protective equipment, such as eye, face, and hearing protection, masks, suitable shoes, etc.

Keep the wooden handle free of chips and cracks.

If the jaws bounce or become loose, a wrench should not be used.

When using hand tools, make sure your work area is clean, dry, well-lit, and free of obstructions when possible.

When using a screwdriver, do not hold something in one hand, press the screwdriver in it, and place it on a bench or table.

When working near flammable materials, be careful of sparks from hand tools. Use non-sparking tools when necessary.

Consider ergonomically designed tools to make them suitable for workers. Especially those tools that are frequently used repeatedly during the day.

Check your tools before each job to make sure they are in the right condition.

Remember, when using hand tools, be sure to use good judgment and work skills to reduce the risk of injury.

2021年11月2日星期二

Preventive Maintenance For Your Power Tools

Power tools are a key part of manufacturing operations. To keep them working properly and to keep employees safe during use, preventive maintenance is very important. This kind of care can not only extend the service life of power tools; it will also increase productivity and efficiency. Here are five methods for preventive maintenance of power tools.


Implement maintenance plan

In order to better protect power tools and employees who use power tools, implement a power tool maintenance plan. This should include clearly defined operating procedures, maintenance intervals, and hazard control. A good way to start this plan is to follow the maintenance plan recommended by the manufacturer. For power tools, this may be simple, such as setting aside a period of time every 6-12 months to ensure that the blades and drill bits are replaced, the safety components are working properly, and any damaged wires are secured. If the manufacturer does not have time to maintain the power tool internally, it can be taken to an authorized service center for regular maintenance.


Appropriate training of employees

Any worker who uses power tools should receive proper training. This training should include not only the best use of their work abilities but also proper inspection, maintenance, and cleaning methods. Should certain power tools be used only under certain circumstances? Some tools can be used when opened, or must they be closed all the time? Is there a correct way to test operator controls? These are things that a properly trained employee should be able to answer problems. Employees should also be authorized to report tool failures to the manager and participate in the execution of power tool maintenance plans.


Use the right tools

One of the biggest mistakes people make when using power tools is not using a tool suitable for the job at hand. This may seem like a time-saving idea to grab the nearest power tool nearby-or continue to use the same job after the job-but it is not. Not only does it not work, but it may also damage the tool and may harm the user. No matter what job you do, you must take the time to find the right power tool. If you need help, please refer to the user manual. These usually provide work capabilities and other skills to extend tool life.


Power tools


Store tools correctly

Power tools are an investment and should be stored properly after each use. If left unprotected, they are more likely to be damaged by other objects or rust inside and outside. When power tools rust, their mechanical devices will eventually fail and stop working. This is dangerous for workers and a bad way to maintain tool life. Instead, store power tools on appropriately marked shelves, in a sturdy toolbox, or in a safe box to reduce damage.


Use the correct power supply

Before using any power tool, please check the rated power on its nameplate to ensure that it matches the power source. Most power tools are designed to work at a specific voltage. Attempting to use a power tool below its voltage limit may result in loss of power, overheating, and damage to the tool. Be especially careful when using generators or extension cords. Both can affect the voltage and the operation of the power tool. The user should also pay attention to any worn or damaged cords: it is best to replace them immediately.

Power tools should be kept properly to ensure long service life and safe use. By adhering to these methods, you can avoid the repair and replacement of power tools, as well as employee injuries.

We are power tools suppliers. Please feel free to contact us if you need or want to know about our products.

2021年10月25日星期一

What Are Some Safety Tips For Using Gear Pullers?

Gear pullers come in various shapes and sizes and have a wide range of uses. Use the right tools when working.

Wear safety glasses or goggles, or a face shield (with safety glasses or goggles).

Choose the right gear puller for each job. Always use a gear puller of the required size or larger. If possible, use a three-jaw puller.

Make sure that the gear puller is aligned with the shaft and close to the part to be removed. The jaws should be parallel to the screws. This ensures direct pull.

Be careful when removing stubborn gears or bearings. Be sure to flatten the head of the center screw. If the gear or bearing is still stuck there after two sharp blows, choose a larger puller and continue to remove the gear or bearing.

Use a protective cap or detachable point to protect the screw from mushrooming or splitting.

If the gear puller starts to deform, stop working.

Cover the work with a cloth to protect you and bystanders from flying parts.

Before use, lubricate the center screw with engine oil.

The gear puller should be cleaned after use and stored in a dry place.


Gear puller


What are some things that I should avoid doing?

Do not use air-powered tools on gear pullers.

Do not use any pullers with functional parts that are excessively worn, dented, or cracked. Check the center screw for signs of wear or seizure.

Do not heat any gear puller. If heated, it loses its strength and breaks under pressure.

Do not cut or grind any part of the gear puller.


How to use a gear puller

Nothing can turn a small thing into a big one like not having the right tool and project turning into a catastrophe. Many components on the engine, transmission and transmission system are installed in a press-fit or interference fit situation where the part fits so tightly it must be pressed on. This means that when you need to disassemble gears, pulleys, bearings, etc., it may require extreme force to make the part slip off or leave its place. This is the importance of having the right tools for the job.

Most bearing or gear pullers have similar designs, they have 2-4 jaws hooks or loop ends, which can hook the items behind you want to remove, and have a center bolt or pin that can tighten down on the center of the shaft. When you tighten the bolt or pin, it pulls the bearings, gears, pulleys, etc. evenly, as if it were installed.

Clean the area-In this job, the biggest mistake you can make is to directly remove the part without cleaning the hole around the part or where the part is located. First, use compressed air and a degreaser to remove all debris from the area where the parts will slide when you pull. Also, check the area for rust and remove it with sandpaper or similar abrasives.

Install the tool-first pass the center pin out so that there is enough space for the arm of the puller to hook behind the part you want to remove. Then find the arm behind the part and tighten the center screw until the pin touches the center shaft. Most manufacturers have designed a dimple on the central shaft so that the tool can ride in it and make sure the pin is located in that recess.

Pull the part off-once you have some pressure on the central shaft to tighten it, you may not see the bearings, gears, or pulleys moving visually. Do not tighten the puller excessively, otherwise, it may cause damage. Instead, first, tighten it down with a wrench or ratchet by hand until it is very tight. Then take a hammer tap around the opening or the central shaft, or the part to help vibrate it lose.

If the parts are not loose, you may have something that is very stuck, and you may need to introduce heat.

If you cannot fully the arms of the puller behind the part, it is not common to modify or clear the arms to make them in a narrow area. Be careful not to take away too much material, because it will reduce the integrity of the arm and also will most certainly void your warranty! We are Gear puller suppliers. Please feel free to contact us if you are interested in our products.

2021年10月16日星期六

What Is a Spring Clamp?

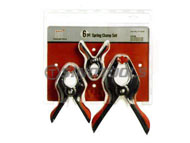
The spring clamp is a quick and simple clamp that uses the pressure of a spring to hold down the material. It is usually used to cut, fasten, or bond materials. There are many useful options when it comes to clamps for your project. Each clamp has a specific purpose and function, which separates it from the others.

What is a spring clamp? A spring clamp is a clamp that uses the pressure of a metal spring to press the two ends to press the material. It is usually used for clamping wood, metal, plastic, and fabric with a single point of pressure. They work great for clamping stop blocks on fences or jigs, clamping power cords up out of the way, fast and easy clamping, and for gluing woodworking projects.


What is a spring clamp?

A spring clamp is a clamp that uses the pressure of a metal spring to clamp down two ends to firmly support the material. They are quick and easy to use for any skill level to help glue, fastening or cutting materials. The size of this clamp is small, but it is actually very powerful, which makes it one of the first types of clamps collected by most woodworkers. The jaws of the clamp usually have plastic or rubber pads to protect the material you are working on from damage.


What are spring clamps used for?

Spring clamps are commonly used to clamp wood, metal, plastic, and fabric with a single point of pressure. Their work is great for clamping stop blocks on fences or jigs, clamping power cords, fast and easy clamping, and gluing woodworking projects.


Are spring clamps safe?

The spring clamp is very safe. They have a fast and easy loading and release action and can use any level of carpentry.


spring clamp


How to measure spring clamps?

The spring clamp is the length from the claw to the end of the handle. This measured length will classify the size of the spring clamp. These sizes range from 3/4 inches to 9 inches or larger. The most common size is a 6-inch spring clamp. The amount of jaw opening is called the clamping force.


How to use a spring miter clamp?

Spring miter clamps are equipped with pliers inserted into the pliers to open and close the jaws. To close them, apply glue to the joints and place the pieces. Use pliers to open the jaws and position the clamp center on the depth of the miter. When released the pronged ends grabs the wood as the spring tension closes the joint. These are great for closing miter joints during glue-up.


How do spring clips work?

A spring clamp is a clamp that uses the pressure of a metal spring to compress both ends to firmly support the material. They are quick and easy to use for any skill level to help with gluing, fastening, or cutting materials.

We are spring clamp suppliers. Please feel free to contact us if you are interested in our products.

2021年10月8日星期五

What Are The Basic Skills When Using Hand Tools?

Ensure that employees receive the appropriate training in the safe use of hand tools.

Training is often provided to teach them how to choose the right tool, how to use each tool correctly, and how to identify when a tool needs repair.

Choose the right tool for the job. Alternatives increase the chance of accidents.

Use tools that keep your wrists straight. Avoid using hand tools with bent wrists.

Use high-quality tools.

Keep the tools in good condition at all times.

Check the tool for defects before use. Replace or repair defective tools.

Keep the knives sharp and cover the sharp edges with suitable coverings to protect the tools and prevent accidental contact injuries.

Replace broken or damaged handles on documents, hammers, screwdrivers, or sleds.

Make sure that the handles of tools such as hammers and axes fit tightly with the tool heads.

Replace worn jaws on wrenches, plumbing tools, and pliers.

Correct the burr or mushroom-shaped head of the beating tool.

Pull a wrench or pliers. Don't use force unless you hold the tool with your hands spread out.

Sharp tools (such as saws, chisels, knives) and handles placed on the bench far away from the aisle should not extend beyond the edge of the top of the bench.

Maintain tools carefully. Keep it clean and dry, and keep it properly after each use.

Pack the tools in a sturdy toolbox to and from the workplace.

Wear safety glasses or goggles, or a face shield (with safety glasses or goggles) and suitable gloves to accommodate the hazards you may be exposed to when doing various tasks.

Keep the working environment clean and tidy to avoid confusion and accidents.

Use a heavy belt or apron to hang the tools by your sides, not behind your back.

Keep your workspace clean and tidy. Store tools properly when not in use.

What should I avoid when using hand tools?

Don't use tools for work they don't intend to do. For example, don’t use a screwdriver as a chisel, crowbar, wedge, or punch, and don’t use a wrench as a hammer.

Do not apply excessive force or pressure to the tool.

Do not cut to yourself when using the cutting tool.

When using a cutting tool or screwdriver, do not hold the cutting board with your hands. Put it on the workbench or in a vise.

Do not wear heavy gloves when operating hand tools.

Don't throw tools. Give them directly to other workers and deal with them first.

Do not carry tools that hinder the use of your hands, and do not use them on ladders, buildings, or when doing any dangerous work. If working on a ladder or scaffolding, tools should be raised and lowered using buckets and hand ropes.

Do not carry sharp tools in your pocket.

Do not use tools during electrical work unless they are designed for electrical work (for example, properly insulated).

Do not leave tools lying around on elevated structures, such as platforms or scaffolding, to prevent the tools from being hit or dropped.

Hand Tool

Hand tool

2021年9月30日星期四

Proper Use of a Hammer

Many of the tools in the merchant’s toolbox are designed to "take a beating"; the hammer falls into this category by definition and is the basic tool of any toolbox.

The history of the hammer can be traced back to ancient times when the Romans also invented the forged iron nail. The Romans invented the claw hammer as a dual-purpose tool for beating and pulling nails.

Hammer

hammer

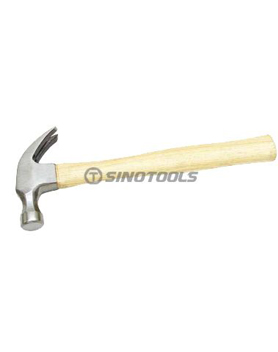
A hammer is a simple design tool consisting of a hammerhead and a hammer handle.

Considering its simple design and widespread use, untrained users may think that using a hammer means hitting the work until the work is completed. This "novice technique" often leads to arm fatigue, unnecessary injuries, and serious injuries.

Professionals are able to select and use the correct hammer for the task and use it to repeat without tiring their arms.

The following steps should be able to achieve high-quality "hammering" work:

Hold the handle firmly. For tasks that require more effort, hold the end of the handle; for tasks that require more control and precision, hold the handle closer to the hammerhead.

Make sure that the hammer surface is always parallel to the surface being hit.

Swing from the elbow for power and from the wrist for control.

Let the weight of the hammer do all the work; with the correct choice of the hammer, there is no need to use your own power to perform the task.

Focus on the piece being hammered, not the tool.

Use smooth, repetitive blows; avoid side blows or side blows, so as not to damage the workpiece or the surface being hit.

How to drive a nail

When drilling nails into hardwood, it is good practice to drill a pilot hole before you start hammering the nails. This method makes hammering easier and prevents wood splitting.

Step 1:

Clamp the hammer in the middle of the handle, and use the thumb and index finger of the hand not holding the hammer to clamp the nail near the top. If the nail is too small, use a piece of cardboard to clamp it, while you must clamp the cardboard.

Step 2:

Tap the nail until it sinks enough to stand on its own.

Step 3:

Using the center of the hammer face, drive the nail in with a smooth hammer. Let the weight of the hammer work. The hitting surface should always be parallel to the hitting surface.

Hammer safety precautions

If used improperly, a hammer can become a very dangerous tool. Follow the suggestions below to avoid harm to yourself and the people around you:

Use the correct hammer. Take a moment to learn about the different characteristics of each model, head weight, or seek professional advice related to your application.

Choose a hammer (for example, nails, chisels, punches, wedges, etc.) whose striking face diameter is approximately 12 mm (0.5 inches) larger than the face of the object being struck.

When using a hammer, be sure to wear protective equipment (safety glasses, gloves, or face shield).

Always keep the hitting face parallel to the hitting surface. Avoid glancing or side blows.

Never use a hammer with a damaged head, as it will damage the workpiece being processed and cause injury.

Never use a hammer with a loose or broken handle. The head may fall off the handle and cause injury.

We are hammer manufacturers. Please feel free to contact us if you are interested in our products.